Upcycling 101
So you’ve decided to have a review of your wardrobe to give some clothes a new lease of life, or you’ve picked up some items from the charity shops that can be freshened up. If you plan to do this with crochet, knitting or even tatting, below are some of the things to consider.
Choose the right yarn
 The first step is to select the right yarn to match the material of your garment. This will require you to consider three things:
- Weight of the yarn – If your garment is made with light cotton fabrics, select a lightweight yarn such as a 3 or 4ply or even thread. Conversely if it is a heavy fabric such as denim, fleece or corduroy, select a heavier yarn such as 8 or 10 ply.
- Washing Instructions –If it is machine washable, you will need to select yarn that will also be machine washable. There are many varieties of acrylic and wool that are machine washable, or try cotton (on a gentle cycle). If it is a garment that is hand wash or dry clean then there is more choice available.
- Where will the patch or insert be added – If it is a panel or patch in an area that needs to stretch – eg knee, or elbow, having nylon as part of the fibre will assist its ability to be more flexible in that area.
Shop yarn here
Adding a trim or edging
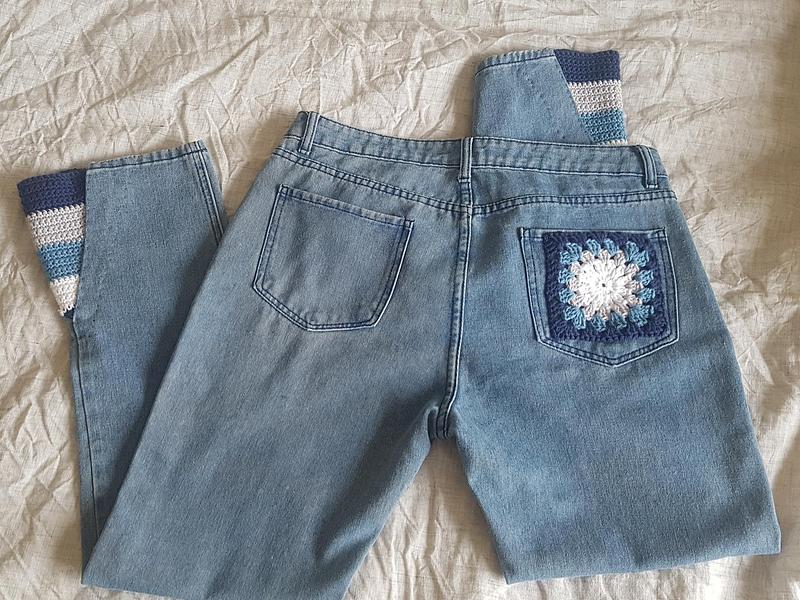
 This is probably one of the easiest ways to upcycle an item. In many cases if you are crocheting you can just add it directly to the garment edge. Use tools such as the edgit, awl or even the crochet edge blade to make your holes in the garment to crochet into. Watch our video to see how to use these tools here.
Or begin with a row of embroidery using blanket stitch. Before you begin, select the pattern for your edging so you know the finished length. If it results in that section of the garment being too long, you may need to shorten the garment first.
Replacing a Panel
Selecting a panel with straight sides will make it easier to construct your crocheted panel. Otherwise it may be difficult to find a pattern to directly fit, in which case you may then need to experiment with shaping.
It will also be easier if your panel is between existing seams on your garment – eg side seams on a jacket or sleeve. In such cases cut the panel out inside the seams leaving approx. 0.5 – 1cm. This edge should be finished with an overlocker or zigzagging.
Keep the removed panel and use it as your template for measuring your crocheted panel against. You will need to crochet the panel about .5 – 1cm larger each side for attaching to your garment.
Once you’ve found the pattern, make a gauge swatch to determine how you will need to adjust the pattern to fit into your panel. For example you may need to add increments of the pattern repeats to get the full width, or reduce the number of repeats. The swatch will also help determine how best to shape with the particular pattern. Use the piece you cut away to measure your new panel against and adjust as necessary.
Attach your completed panel to your garment – this can be done by hand sewing or using a sewing machine. Ensure the new panel overlaps the garment for the seam length allowed. If hand sewing you could use the same yarn/thread you crocheted with to attach it – although you may need to split the yarn so it is not too thick. Keep the stitches small. If you do use a sewing machine, ensure you use a blunt needle. You may also need to sew two rows around the edge to secure the overlapping section.
Patches
 These can be placed anywhere – to cover a hole or tear or stain or just to jazz up the garment. The size is generally unimportant – except to ensure it is big enough to cover any tear or hole or stain. It could be square, circular, triangle or any free-form scrumble!
If you are covering up a hole or tear, you don’t need to cut it away, but you may consider tidying up the edges so it doesn’t get worse. This can be done with an overlocker or zigzagging with a sewing machine.
Once complete, sew your patch onto your garment in the desired place, using either of the methods discussed above.
So what item in your wardrobe need a make-over?

